Slice: Difference between revisions
Jump to navigation
Jump to search
mNo edit summary |
mNo edit summary |
||
| Line 1: | Line 1: | ||
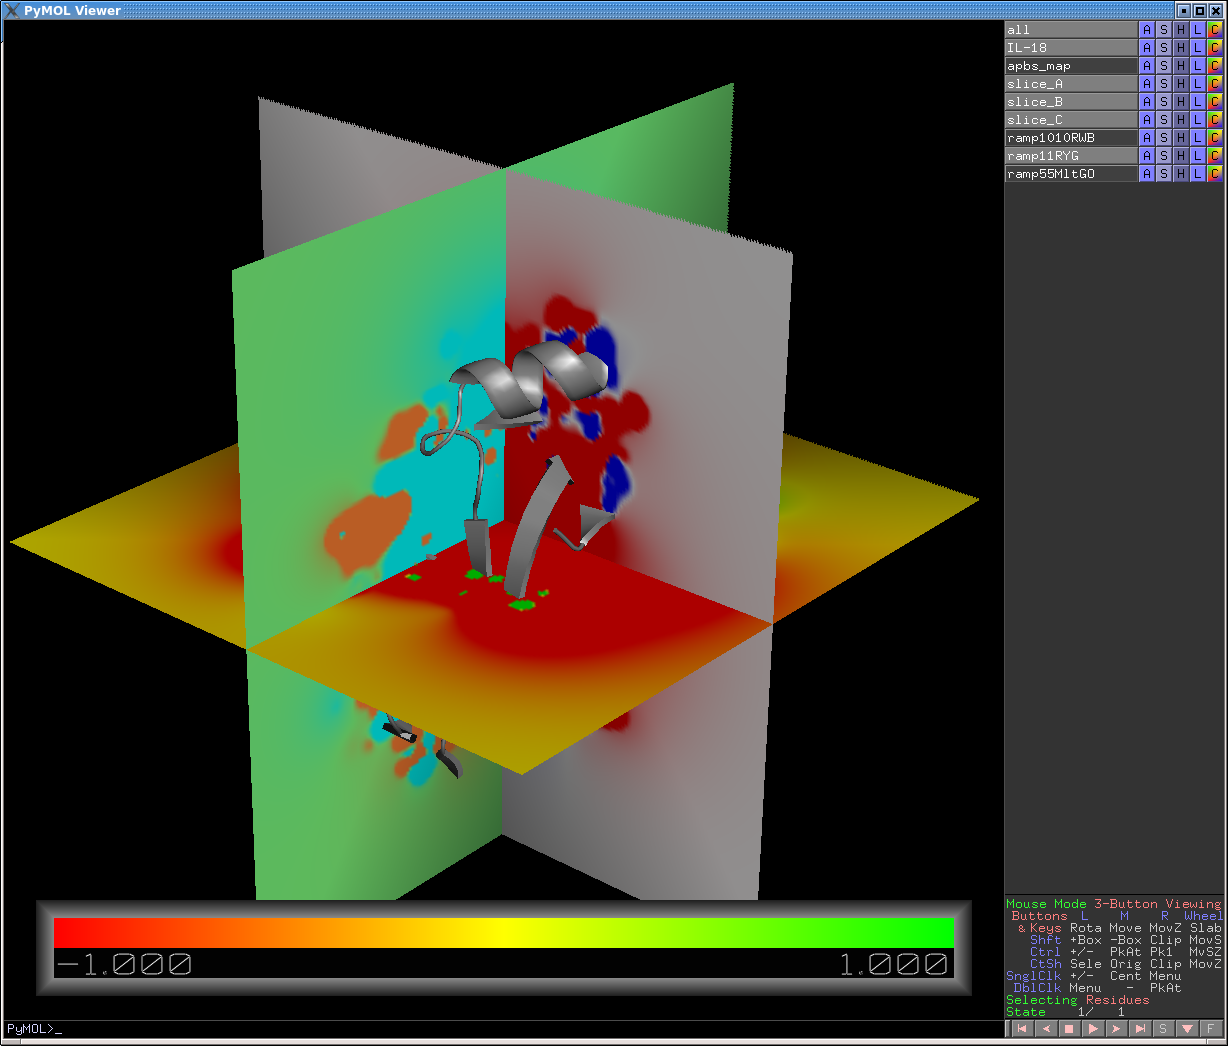
[[File:Slice_example_2_screenshot.png| | [[File:Slice_example_2_screenshot.png|500px|thumb|right|border|Screenshot of slice example #2]] | ||
[[slice]] creates a slice object from a [[:Category:Maps|map]] object. | [[slice]] creates a slice object from a [[:Category:Maps|map]] object. | ||
Revision as of 17:49, 16 March 2011
slice creates a slice object from a map object.
USAGE
slice_new name, map, [state, [source_state]]
or
slice name, map, [state, [source_state]]
ARGUMENTS
- name = the name for the new slice object (string)
- map = the name of the map object to use for computing the slice (string)
- state = the state into which the object should be loaded (default=1; set state=0 to append new mesh as a new state)
- source_state = the state of the map from which the object should be loaded (default=0)
EXAMPLES
# Create a map slice plane perpendicular to current view
slice a_new_slice, a_map


# A more complicated example that shows how to create multiple slices
# (in this case, 3 slices perpendicular to each other), each colored
# with a different color ramp and different contour levels:

# Reset the view, to align view on XYZ axes
reset
# (Optional: Adjust view direction to your liking)
# Create a map slice *perpendicular* to the current view.
# The slice seems to be in the center of the APBS (or other) volmap. Map "tracking" is off by default.
slice slice_A, apbs_map
# Rotate camera 90 degrees about the vertical axis
turn y, 90
# Second, perpendicular, slice
slice slice_B, apbs_map
# Rotate again, this time about the horizontal
turn x, 90
# Third slice
slice slice_C, apbs_map

# Define new color ramps: ramp_name, map_object, list of low/mid/hi values, 3 RGB triplets
ramp_new ramp1010RWB, apbs_map, [-10,0,10], [ [1,0,0], [1,1,1], [0,0,1] ]
ramp_new ramp11RYG, apbs_map, [-1,0,1], [ [1,0,0], [1,1,0], [0,1,0] ]
ramp_new ramp55MltGO, apbs_map, [-5,0,5], [ [0,1,1], [0.5,1,0.5], [1,0.5,0.2] ]

# Color the map slices
color ramp1010RWB, slice_A
color ramp11RYG, slice_B
color ramp55MltGO, slice_C

# Adjust the fineness of the slice color gradations:
cmd.set('slice_grid',0.1) # normally at 0.3; much finer than 0.05 gets a bit slow

# Map slices can be moved, relative to other fixed objects (e.g., your protein/DNA/RNA),
# by turning tracking on (Action menu), and the using the Shift-MouseWheel to move
# the slice forward in and backward in Z. Adjust fineness of this Z-motion with:
#   cmd.set('mouse_wheel_scale',0.05) # normally at 0.5

# The result is shown in the image above.
PYMOL API
cmd.slice_new(string slice_name, string map_name, integer state=0, integer source_state=0)
NOTES
Mis-identified as "slice_map" in documentation. slice or slice_new is the correct command. Documentation also mentions two optional parameters which seem to be no longer supported (opacity = opacity of the new slice, and resolution = the number of pixels per sampling).
SEE ALSO
References
- PyMOL Source code
