Ray: Difference between revisions
No edit summary |
m (→Renderer) |
||
| Line 53: | Line 53: | ||
====Renderer==== | ====Renderer==== | ||
renderer = -1 is default (use value in ray_default_renderer) | '''renderer = -1''' is default (use value in ray_default_renderer) | ||
renderer = 0 uses PyMOL's internal renderer | |||
renderer = 1 uses PovRay's renderer. This is Unix-only and you must have "x-povray" in your path. It utilizes two temporary files: "tmp_pymol.pov" and "tmp_pymol.png". | '''renderer = 0''' uses PyMOL's internal renderer | ||
'''renderer = 1''' uses PovRay's renderer. This is Unix-only and you must have "x-povray" in your path. It utilizes two temporary files: "tmp_pymol.pov" and "tmp_pymol.png". | |||
===SEE ALSO=== | ===SEE ALSO=== | ||
Revision as of 22:11, 30 May 2005
DESCRIPTION
"ray" creates a ray-traced image of the current frame. This can take some time (up to several minutes, depending on image complexity).
USAGE
ray [width,height [,renderer [,angle [,shift ]]]
angle and shift can be used to generate matched stereo pairs
EXAMPLES
ray
ray 1024,768
ray renderer=0
PYMOL API
cmd.ray(int width,int height,int renderer=-1,float shift=0)
FEATURES
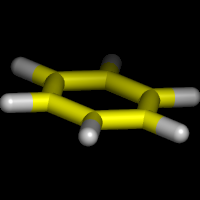
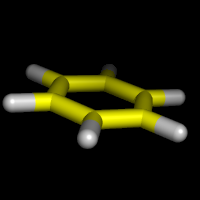
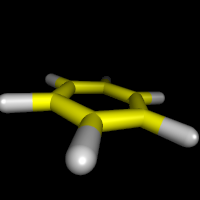
Perspective
Perspective Example Images
Notes
PyMol 0.97 and prior used orthoscopic rendering -- that is, no perspective. Upon the arrival of 0.98 and later, we get perspective based rendering at a cost of a 4x decrease in render speed. If you want perspective
set orthoscopic, off
Otherwise
set orthoscopic, on
To magnify the effect of perspective on the scene,
set field_of_view, X
where 50<X<70. Default is 20. 50-70 gives a very strong perspective effect. Nb. the field of view is in Y, not X as one would expect.
Renderer
renderer = -1 is default (use value in ray_default_renderer)
renderer = 0 uses PyMOL's internal renderer
renderer = 1 uses PovRay's renderer. This is Unix-only and you must have "x-povray" in your path. It utilizes two temporary files: "tmp_pymol.pov" and "tmp_pymol.png".
SEE ALSO
"help faster" for optimization tips with the builtin renderer. "help povray" for how to use PovRay instead of PyMOL's built-in ray-tracing engine.
USER Comments
How do I ray trace a publication-ready (~300dpi) image using PyMol?
This answer is in the Advanced Issues (Image Manipulation Section).


