Depth cue: Difference between revisions
Jump to navigation
Jump to search
No edit summary |
|||
| (2 intermediate revisions by one other user not shown) | |||
| Line 12: | Line 12: | ||
set depth_cue, 1 # turn on depth cueing | set depth_cue, 1 # turn on depth cueing | ||
set depth_cue, 0 # turn off depth cueing | set depth_cue, 0 # turn off depth cueing | ||
set fog_start, 0.45 #use a number between 0.01 and 0.99 to adjust where the fog will start in the plane of view. Default is 0.45 | |||
</source> | </source> | ||
| Line 20: | Line 21: | ||
|} | |} | ||
== See Also == | == See Also == | ||
[[ | [[Ray_Trace_Fog]], [[Field_Of_View]] | ||
[[Category:Settings|Depth cue]] | |||
Latest revision as of 17:14, 2 November 2007
Overview
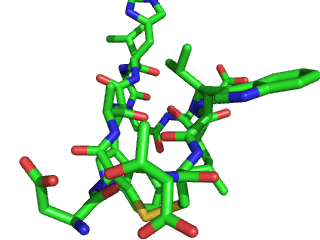
One can adjust the fog that PyMol overlays on objects in the viewer window. This fog helps to assist in emphasizing what is in the foreground and backgound of the image with respect to the camera.
In mouse mode, 3-Button Viewing:
Rear clipping plane- hold down the shift key and the right mouse button and drag the mouse to the right, more fog will be added to the background. Drag to the left and more fog will be removed from the background.
Front clipping plane- hold down the shift key and the right mouse button and drag the mouse toward you. You should see the clipping plane come into view. Adjust the front and rear clipping plane to focus on the area of the molecule you wish to display.
Syntax
set depth_cue, 1  # turn on depth cueing
set depth_cue, 0  # turn off depth cueing
set fog_start, 0.45 #use a number between 0.01 and 0.99 to adjust where the fog will start in the plane of view. Default is 0.45

